
How To Shoot 2D Photos For a Perfect Wiggling Image?
Creating wigglegrams is pretty easy when you follow these guidelines
When you explore photography it seems natural that you scratch the surface of every aspect of it. Since 3D photography is one of them, we got you covered.We talked about wiggle stereoscopy in our previous post and got you interested, but let’s dig a little deeper. It’s learning time guys, so stop wiggling… No, start wiggling, but in a good way.
We talked about wiggle stereoscopy in our previous post and got you interested, but let’s dig a little deeper. It’s learning time guys, so stop wiggling… No, start wiggling, but in a good way.
The origins od 3D photography
3D photography is not new. Its origin takes us back for almost 180 years. Yes, that long. And all thanks to Sir Charles Wheatstone, a scientist who explored the complexity of human eyes and their ability to perceive depth perception. His studies led him to experiment with binocular vision by combining two images into one 3D image. That brings us to first 3D photos called stereograms and first 3D viewing device – stereoscope. (more on stereoscope – here)
A few decades later, Wilhelm Rollmann showed the world another method for creating and viewing 3D images – anaglyph. Basically, like with any kind of 3D images you need two 2D photos taken from slightly different angles. But in this case the photos are filtered with different colors, usually red and cyan, and stacked one on top of the other. To see 3D effect, you’ll need a pair of anaglyph glasses (red&cyan), so images reach both eyes in a compatible way.
Wigglegram’s advantages come from practicality
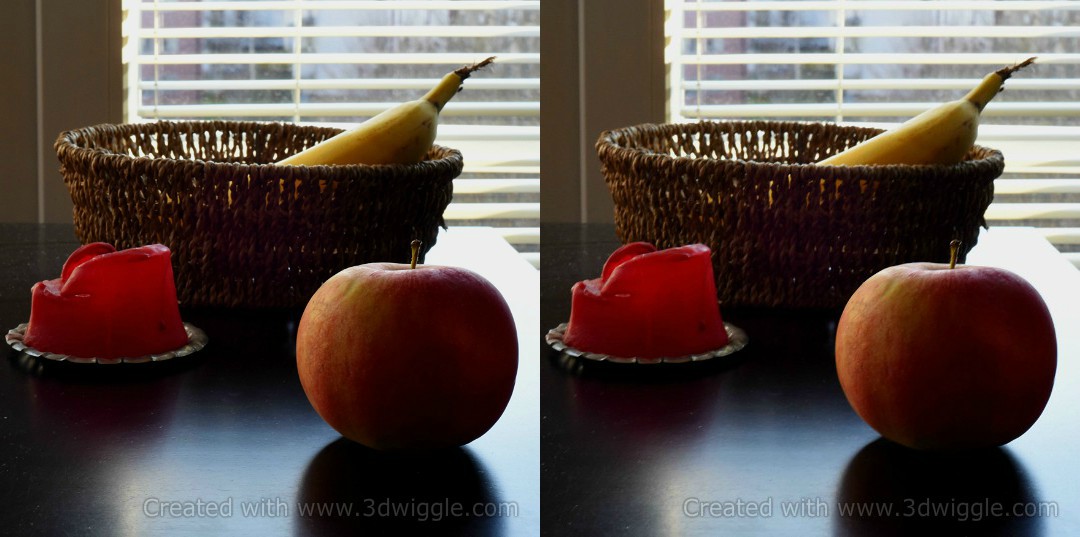
The third and for us the most fun type of 3D photography is wiggle 3D or wiggle stereoscopy or wigglegram or in japanese – Piku Piku.
The reason we prefer this type of 3D photography is because it is practical:
- You don’t need any additional equipment to see the 3D effect
- Most of the people can see the effect right away opposite to cross-eye and parallel viewing techniques
- Even the people with limited or no vision in one eye can enjoy the 3D effect
- You can export it as video or always popular animated GIF and share it across the social media
Control of the camera is the key
Creating 3D photos is pretty fun, but it does require some skill. Of course, if you have a 3D camera, things go much smoother, but this time we are going to talk about making shots for 3D photo with your DSLR, point&shoot or your smart phone camera.
To take a perfect photography by your standards, you have to shoot the object at the perfect time, conditions and camera settings, right? Well, if you want to create the perfect 3D photo, you’ll have to do that at least twice in a row. Don’t let this scare you, it can be a great challenge and an opportunity to evolve as a photographer.
The guidelines for creating 2D photos for wigglegrams are quite simple. It’s the practice that will take away your time at the beginning, but it is going to worth it.

For start, take your phone camera so you can take test shots as you read.
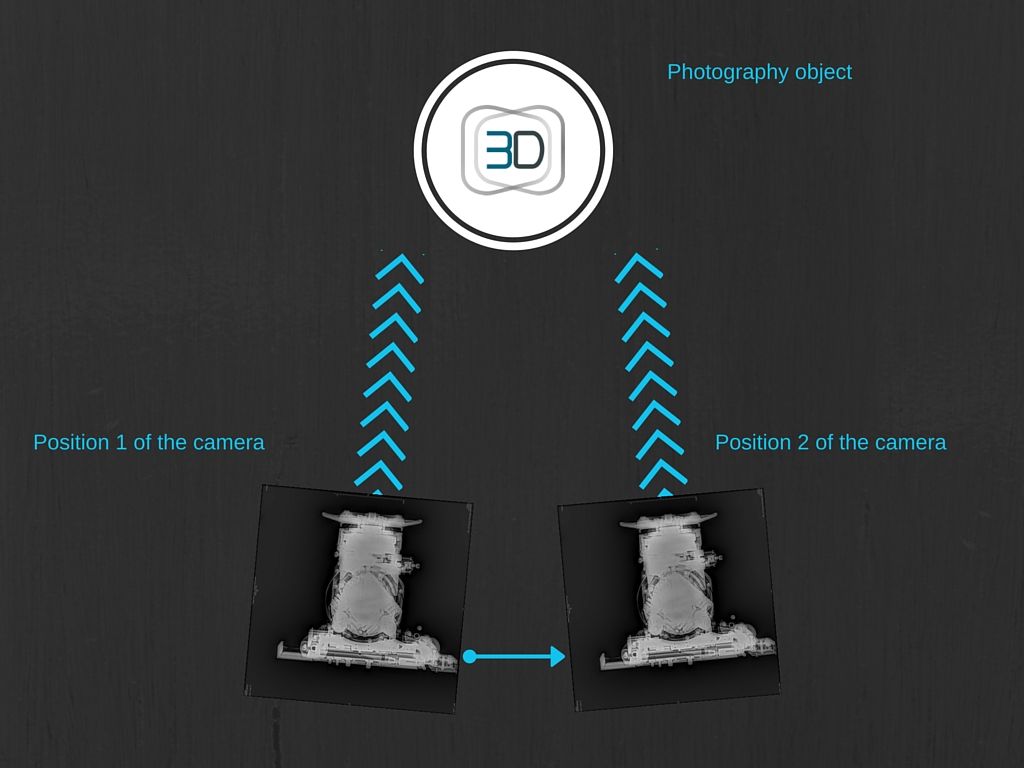
Ok, we are finally here. With your camera out and ready, choose an object near you, focus on it in viewfinder and shoot. Now comes the tricky part. The distance to your next shot depends on the object’s distance from the camera. The farther the object is from the camera, the distance between the shots is longer and vice versa.
For example, if you are taking pictures of an object right in front of you (say 5-6 feet), the distance between the shots shouldn’t be longer than few inches. One shot from the left, one from the right eye. If you move away from the object, the second shot should be a little further from the first. You get the picture, it’s not like exact science.
Once you take the first picture, next few images need to be aligned, so keep your camera steady as you move to your right and shoot. Here’s what you do. Imagine the rope tied between the object and the camera, so as you move to your right, the distance to the object stays the same and your lens is still pointed at it. It’s like you are making a circle.
This should save you a lot of time when you’re setting the images for wigglegram. If you moved the camera a bit back or forward, you can easily correct it using zoom +/- tool in 3DWiggle software.
The second tricky part is to keep your camera from going up and down while you take pictures. We’ll go with a different analogy this time. Imagine your camera is on a rail (but still tied to the object with a rope). So as you slide to your right you just keep your camera steady and take shots. I know, it sounds easy, but it’s harder when you’re actually doing it.
These guidelines covered you for the basics. After some practice you’ll notice that the moves come natural. Here’s one more tip: try and make as many shots as possible, so when you import the images to your computer you’ll have a lot of samples to choose from. If you need more info or have any questions, feel free to ask in the comments below.
Resources
ANAGLYPH 3D
In-text:(“Anaglyph 3D”)
“Anaglyph 3D”.Wikipedia. N.p., 2016. Web. 31 Mar. 2016.
Johnson, J. (2011).Past and Future Collide: Taking 3D Photos. [online] Photo & Video Envato Tuts+. Available at: http://photography.tutsplus.com/tutorials/past-and-future-collide-taking-3d-photos–photo-6002